
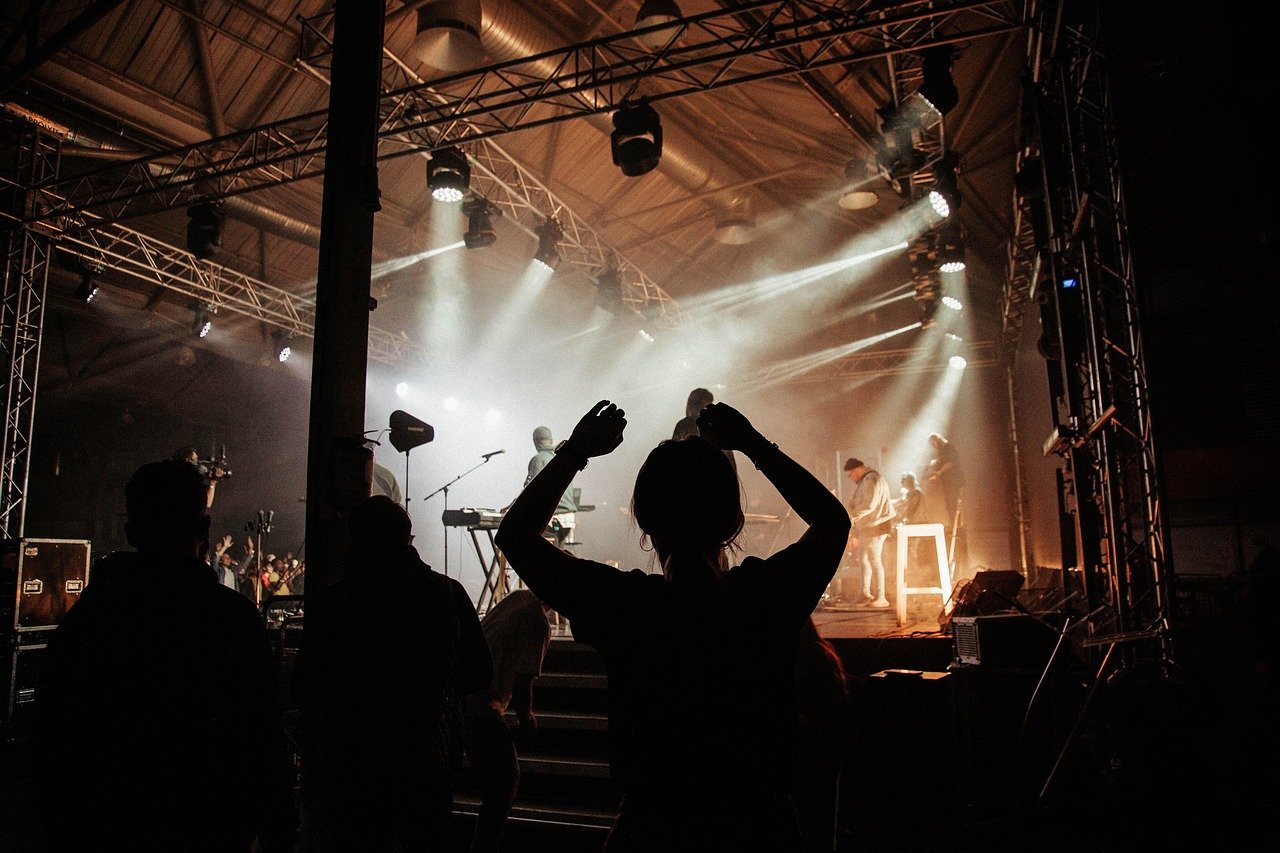
Embarking on the journey of audio production is akin to stepping into a world where creativity meets technology, where raw sound is sculpted into an immersive auditory experience. Whether you’re an aspiring musician, a podcaster, a filmmaker, or simply passionate about sound, understanding the nuances of audio production is paramount. It’s the art and science of capturing, manipulating, and refining sound to achieve a desired sonic outcome, transforming mere noise into compelling narratives and emotionally resonant music. Dive in to discover the essential elements that define professional audio quality and unlock your potential in the sound realm.
Understanding the Fundamentals of Audio Production
Audio production is a multifaceted discipline that encompasses every stage of creating finished audio. From the initial spark of an idea to the polished final product, each step is critical in delivering a high-quality sound experience. Understanding these fundamentals lays the groundwork for any aspiring audio professional or enthusiast.
What is Audio Production?
At its core, audio production is the process of recording, editing, mixing, and mastering audio for various media. This can include music, podcasts, film, television, video games, and even commercial advertisements. It involves technical expertise, an artistic ear, and a deep understanding of acoustics and audio engineering principles.
- Music Production: Focuses on creating songs, albums, and soundtracks.
- Post-Production Audio: Deals with sound for visual media, including dialogue editing, sound effects, and foley.
- Podcast Production: Centered on recording, editing, and mixing spoken word content.
Key Stages of Audio Production
The journey of audio production typically follows a structured path, each stage building upon the last to achieve the desired sonic clarity and impact.
- Recording: The initial capture of sound using microphones or direct input. This stage demands attention to source quality, microphone choice, and proper gain staging.
- Editing: Refining the recorded audio. This involves removing unwanted noise, correcting timing issues, compiling takes, and arranging audio clips.
- Mixing: The creative process of balancing and enhancing all individual tracks within a project. This stage shapes the sonic landscape, adding depth, clarity, and excitement through EQ, compression, reverb, and more.
- Mastering: The final polish applied to a complete stereo (or surround) mix. Mastering optimizes the audio for playback across various systems, ensuring consistent loudness, sonic balance, and competitive quality.
Why Quality Audio Matters
In an increasingly digital world, listener expectations for audio quality are higher than ever. Poor audio can detract significantly from content, regardless of its underlying quality.
- Professionalism: High-quality audio conveys professionalism and attention to detail.
- Engagement: Clear, well-produced audio keeps listeners engaged and prevents fatigue.
- Credibility: Especially in podcasts and educational content, good audio builds trust and credibility.
- Impact: In music and film, superior audio elevates the emotional impact and immersiveness of the experience.
Actionable Takeaway: Invest time in understanding each stage of audio production. Even if you specialize in one area, a holistic view will make you a more effective and versatile producer.
Essential Gear for Your Audio Production Journey
Setting up a functional audio production studio, whether a professional facility or a home studio, requires a careful selection of equipment. The right tools can significantly impact your workflow and the quality of your output. Here’s a breakdown of the core components every audio producer needs.
Digital Audio Workstations (DAWs)
The Digital Audio Workstation (DAW) is the heart of any modern audio production setup. It’s software that allows you to record, edit, mix, and master audio.
- Pro Tools: Industry standard, renowned for its robust recording and mixing capabilities.
- Ableton Live: Popular for electronic music production, live performance, and innovative sound design.
- Logic Pro X: Apple-exclusive, offering a comprehensive suite of tools for music production at an accessible price point.
- FL Studio: Favored by beatmakers and hip-hop producers for its intuitive pattern-based workflow.
- Reaper: A highly customizable and affordable DAW, excellent for those on a budget or looking for flexibility.
Practical Example: For recording vocals and instruments, Pro Tools excels in track management and editing precision. For composing electronic music, Ableton Live’s session view and MIDI capabilities offer unmatched creative flow.
Microphones: Capturing the Sound Source
Microphones are your ears in the recording process. Choosing the right one for the source is crucial.
- Dynamic Microphones: Robust, handle high sound pressure levels (SPLs) well. Ideal for live vocals, drums, and loud guitar amps (e.g., Shure SM57, SM58).
- Condenser Microphones: More sensitive, wider frequency response, and require phantom power. Excellent for studio vocals, acoustic instruments, and capturing detailed sounds (e.g., Neumann U87, Rode NT1-A).
- Ribbon Microphones: Known for their warm, natural sound, often used for vocals, guitar amps, and brass instruments (e.g., Royer R-121).
Actionable Takeaway: Start with a versatile large-diaphragm condenser microphone for vocals and acoustic instruments, and a dynamic microphone for electric guitars or louder sources. Research microphone polar patterns (cardioid, omnidirectional, figure-8) to understand their directional pickup capabilities.
Audio Interfaces: The Bridge to Your Computer
An audio interface converts analog audio signals from microphones and instruments into digital data your DAW can understand, and vice-versa for playback. They typically connect via USB, Thunderbolt, or Firewire.
- Key Features: Number of inputs/outputs, preamp quality, sample rate and bit depth, direct monitoring capabilities.
- Benefits: Superior sound quality compared to onboard computer sound cards, reduced latency, phantom power for condenser mics, dedicated instrument inputs.
Practical Example: A Focusrite Scarlett 2i2 is an excellent starter interface, offering two high-quality preamps for simultaneous vocal and guitar recording. For more inputs and advanced features, consider Universal Audio Apollo or RME interfaces.
Studio Monitors & Headphones: Critical Listening Tools
Accurate playback is essential for making informed mixing and mastering decisions. Consumer speakers or headphones are often colored, presenting an inaccurate representation of your audio.
- Studio Monitors: Designed for flat frequency response, providing an uncolored sound. They are crucial for hearing your mix as it truly is (e.g., KRK Rokit, Yamaha HS series, Neumann KH series).
- Studio Headphones: Offer an isolated listening environment, helpful for detailed editing, checking reverbs, and identifying noise. Both open-back (wider soundstage) and closed-back (better isolation) options exist (e.g., Beyerdynamic DT 770/990 Pro, Sony MDR-7506).
Actionable Takeaway: Invest in the best studio monitors your budget allows and position them correctly in your space (equilateral triangle with your listening position). Supplement with high-quality, neutral studio headphones for detailed work and checking your mix in a different context.
Acoustic Treatment: The Unsung Hero
Even the best gear won’t compensate for a poorly treated room. Acoustic treatment manages reflections and reverberation, allowing you to hear your audio accurately.
- Absorption Panels: Reduce reflections and reverberation (e.g., foam panels, rockwool absorbers).
- Bass Traps: Crucial for controlling low-frequency build-up, especially in corners.
- Diffusers: Scatter sound waves to create a more natural, spacious sound field.
Practical Example: Placing absorption panels at first reflection points (the spots on your walls/ceiling where sound from your monitors bounces directly to your ears) dramatically improves clarity. Corner bass traps prevent muddy low-end in your mix.
Actionable Takeaway: Start with basic acoustic treatment, focusing on absorption at first reflection points and bass traps. Even DIY solutions can make a significant difference in your monitoring accuracy.
The Art and Science of Recording
Recording is where the magic begins – capturing raw sound in its purest form. A good recording is the foundation of a great mix and master. This stage demands precision, a keen ear, and an understanding of acoustic principles.
Microphone Placement Techniques
Where you place your microphone relative to the sound source can drastically alter the captured tone.
- Proximity Effect: The closer a directional microphone is to a sound source, the more bass response it picks up. Use this creatively or be aware of it for vocal recordings.
- 3:1 Rule: When using multiple microphones, the distance between microphones should be at least three times the distance from each microphone to its sound source to avoid phase issues.
- On-Axis vs. Off-Axis: Directing the microphone capsule directly at the sound source (on-axis) typically captures the brightest, most direct sound. Slightly off-axis can soften harsh frequencies.
- Stereo Techniques:
- X/Y: Two directional microphones angled at 90-110 degrees, capsules close together, for a coherent stereo image.
- ORTF: Simulates human hearing with specific spacing and angles for a wider stereo spread.
- Spaced Pair: Two omnidirectional or cardioid mics placed several feet apart, offering a wide, spacious sound but potentially less focused center image.
Practical Example: For recording an acoustic guitar, try placing a large-diaphragm condenser around the 12th fret, about 6-12 inches away, pointing towards the body for warmth and clarity. Add a second small-diaphragm condenser near the bridge for articulation, ensuring you apply the 3:1 rule if using both.
Gain Staging: Setting the Right Levels
Proper gain staging ensures a clean signal chain, maximizing signal-to-noise ratio and preventing distortion.
- Input Gain: Adjust the preamp gain on your audio interface so that peaks are healthy (e.g., -12 dBFS to -6 dBFS) but never clip (go into the red).
- Avoiding Clipping: Digital clipping is harsh and irreversible. Always record with headroom.
- Signal Flow: Understand how audio travels from source to DAW, ensuring optimal levels at each stage.
Actionable Takeaway: Always set your input gain conservatively during recording. It’s better to record a little too quiet and boost in the mix than to record too loud and clip. Use your DAW’s meters as a guide.
Monitoring During Recording
What the performer hears (and what you hear) during recording is crucial for performance and technical accuracy.
- Low Latency: Essential to avoid a distracting delay between playing an instrument/singing and hearing it back. Audio interfaces often have direct monitoring capabilities.
- Headphone Mixes: Provide performers with a customized mix, highlighting their instrument or vocals, often with reverb or delay for comfort.
Practical Example: When recording a vocalist, create a headphone mix with their voice slightly louder than the backing track, adding a touch of reverb to help them feel more comfortable and perform better. Use your audio interface’s direct monitoring feature to bypass DAW latency.
Room Acoustics for Recording
The room itself acts as an equal part of the microphone system. Managing its sound is vital.
- Minimizing Reflections: Use absorption panels to tame flutter echoes and harsh reflections, especially behind the vocalist or instrument.
- Creating a “Dry” Sound: Often preferred for recording, as you can add effects like reverb and delay later in the mix.
- Diffusion: Can be used to break up strong reflections without making the room sound entirely dead, creating a more natural ambiance.
Actionable Takeaway: Before investing in expensive gear, treat your recording space. Even blankets, mattresses, and strategically placed furniture can improve acoustic characteristics, especially for vocal recordings. A reflection filter for your mic can also help in untreated rooms.
Mixing: Shaping Your Sound
Mixing is where individual recorded tracks are balanced, processed, and blended into a cohesive and impactful stereo image. It’s a highly creative stage that requires technical skill and a deep understanding of how different elements interact.
EQ (Equalization): Sculpting Frequencies
Equalization (EQ) allows you to boost or cut specific frequencies, shaping the tonal character of individual tracks and creating space in the mix.
- Surgical EQ: Identifying and cutting problematic resonant frequencies or muddy build-ups.
- Creative EQ: Boosting pleasing frequencies to enhance warmth, presence, or brilliance.
- High-Pass Filter (HPF) & Low-Pass Filter (LPF): Removing unwanted low-end rumble or harsh high-end sizzle. Applying HPFs to almost every track (except bass and kick drum) can clean up a mix significantly.
Practical Example: A common mixing tip is to use EQ to create “pockets” for instruments. For instance, if your bass guitar has a strong presence around 200 Hz, you might gently cut 200 Hz on your kick drum and perhaps boost it slightly on the bass to give each instrument its own frequency space, improving clarity.
Compression: Controlling Dynamics
Compression reduces the dynamic range of a signal, making quiet parts louder and loud parts quieter, resulting in a more consistent and present sound.
- Threshold: The level at which the compressor starts working.
- Ratio: How much the signal above the threshold is reduced.
- Attack & Release: How quickly the compressor reacts to and lets go of the signal.
- Make-up Gain: Used to restore the perceived loudness lost due to compression.
- Creative Uses: Can add punch to drums, sustain to guitars, and glue elements together.
Actionable Takeaway: Start with gentle compression settings (e.g., 2:1 to 4:1 ratio, medium attack, fast release) on vocals to maintain consistency without sounding overly processed. Experiment with parallel compression (blending an uncompressed signal with a heavily compressed one) for adding punch without squashing dynamics.
Reverb & Delay: Adding Space and Depth
These time-based effects are crucial for creating a sense of space, dimension, and excitement in a mix.
- Reverb: Simulates the natural reflections of a sound in a specific acoustic space (e.g., hall, plate, room, spring).
- Use sparingly to avoid washing out the mix.
- Consider using send/return tracks for reverb to save CPU and create a cohesive space.
- Delay: Repeats a sound after a set period.
- Can add rhythmic interest, slap-back effects, or create a sense of vastness.
- Syncing delay times to the song’s tempo can be very effective.
Practical Example: Add a short, bright plate reverb to vocals for shimmer and presence. Use a dotted eighth-note delay on a guitar solo to fill out space and add rhythmic texture without cluttering the mix.
Panning & Stereo Imaging: Creating Width
Panning positions sounds in the stereo field (left to right), while stereo imaging techniques create the illusion of width and depth.
- Creating Space: Pan elements like guitars, backing vocals, and keyboards to different positions to make room for lead instruments (e.g., lead vocals, kick, snare, bass typically remain center).
- Balance: Ensure your mix sounds balanced even when collapsed to mono (mono compatibility is crucial for many playback systems like phones and club PAs).
- Width Enhancers: Plugins that can spread sounds across the stereo field, but use with caution to avoid phase issues.
Actionable Takeaway: Experiment with panning groups of instruments. For example, pan rhythm guitars left and right, then pan harmony vocals slightly in from the guitars to create a sense of enclosure for the lead vocal.
Automation: Bringing Tracks to Life
Automation allows you to program changes to parameters (volume, pan, EQ, effects sends, etc.) over time, adding movement and dynamism to your mix.
- Volume Automation: Essential for riding vocal levels, emphasizing certain words, or dipping instruments during a busy section.
- Pan Automation: Can move sounds across the stereo field for dramatic effect.
- Effects Automation: Gradually increasing reverb on a vocal line leading into a chorus, or sweeping a filter on a synth pad.
Practical Example: Automate the volume of a backing vocal track to dip slightly when the lead vocal is present, and then rise during instrumental breaks, ensuring the lead vocal always cuts through clearly.
Actionable Takeaway: Don’t just set and forget your levels and effects. Use automation to make your mix dynamic and expressive. Start with volume automation on lead elements to ensure they always sit perfectly in the mix.
Mastering: The Final Polish
Mastering is the critical final step in audio production, transforming a finished stereo mix into a release-ready master. It’s an art that requires specialized tools and a highly trained ear to ensure your audio sounds its best on any playback system.
What is Mastering?
Mastering is the process of optimizing the loudness, tonal balance, and stereo width of a complete mix, preparing it for distribution. It’s the last chance to enhance your audio before it reaches the public.
- Purpose: To achieve competitive loudness, ensure consistency across an album, correct any subtle mix imperfections, and prepare files for various formats (streaming, CD, vinyl).
- Key Goal: To make the audio translate well across diverse playback systems, from high-fidelity studio monitors to car stereos and mobile devices.
Key Mastering Tools
Mastering engineers use a specific set of tools to achieve their goals, often with extremely transparent and high-quality algorithms.
- Limiter: The most crucial tool for achieving competitive loudness without introducing audible distortion. It prevents the audio signal from exceeding a set peak level (0 dBFS for digital, or often -1 dBFS for streaming).
- Multiband Compressor: Allows for dynamic control over specific frequency ranges, helping to balance the tonal spectrum without affecting the entire signal.
- Mastering EQ: Used for subtle tonal shaping, addressing any remaining frequency imbalances in the full mix. Often uses broad, gentle curves.
- Stereo Imager: To subtly adjust the width of the stereo field, ensuring a strong center image and pleasing side information.
Practical Example: A mastering engineer might use a transparent mastering EQ to add a subtle high-end sheen around 10-12 kHz to brighten the overall mix, and a slight low-mid cut around 250 Hz to reduce muddiness, making the mix sound clearer and more open.
Loudness Standards: LUFS and Streaming
With the rise of streaming platforms, understanding Loudness Units Full Scale (LUFS) is crucial. Platforms like Spotify, Apple Music, and YouTube normalize audio to specific LUFS targets to prevent drastic volume changes between songs.
- Integrated LUFS: A measurement of the average loudness over an entire track.
- Target Loudness:
- Spotify: -14 LUFS
- Apple Music: -16 LUFS
- YouTube: -13 to -15 LUFS
- True Peak: Aim for a True Peak of -1 dBTP to avoid inter-sample peaks that can cause distortion after encoding.
Actionable Takeaway: Instead of aiming for maximum loudness (the “loudness war”), master your tracks to the recommended LUFS targets for streaming services. A track mastered too loud will simply be turned down by the platform, potentially sounding less dynamic than a track mastered correctly.
Importance of Reference Tracks
Using reference tracks is an invaluable part of the mastering process. These are commercially released songs in a similar genre or with a desired sonic quality.
- Benchmarking: Compare your master to professional tracks to assess tonal balance, loudness, dynamics, and stereo image.
- Informing Decisions: Helps guide your mastering choices, ensuring your track is competitive in the market.
Practical Example: Before you start mastering, gather 2-3 commercially successful tracks that have the sonic quality you admire. Listen to them critically alongside your own mix, paying attention to bass presence, vocal clarity, and overall loudness. This will give you a target to aim for.
Actionable Takeaway: Always A/B (compare) your master with professional reference tracks using level-matched playback. This objective comparison is key to making informed decisions and avoiding ear fatigue.
Conclusion
Audio production is a captivating journey that demands both technical prowess and artistic intuition. From understanding the fundamentals and assembling your essential gear to meticulously recording, creatively mixing, and precisely mastering, each stage contributes to the final sonic tapestry. While the tools and techniques can seem daunting at first, remember that practice, patience, and a keen ear are your most valuable assets.
The pursuit of excellent audio quality is a continuous learning process. Embrace experimentation, analyze your work critically, and never stop refining your craft. By dedicating yourself to these principles, you will not only produce audio that sounds professional but also create experiences that truly resonate with your audience. So, grab your headphones, fire up your DAW, and let your creativity transform the world of sound.