
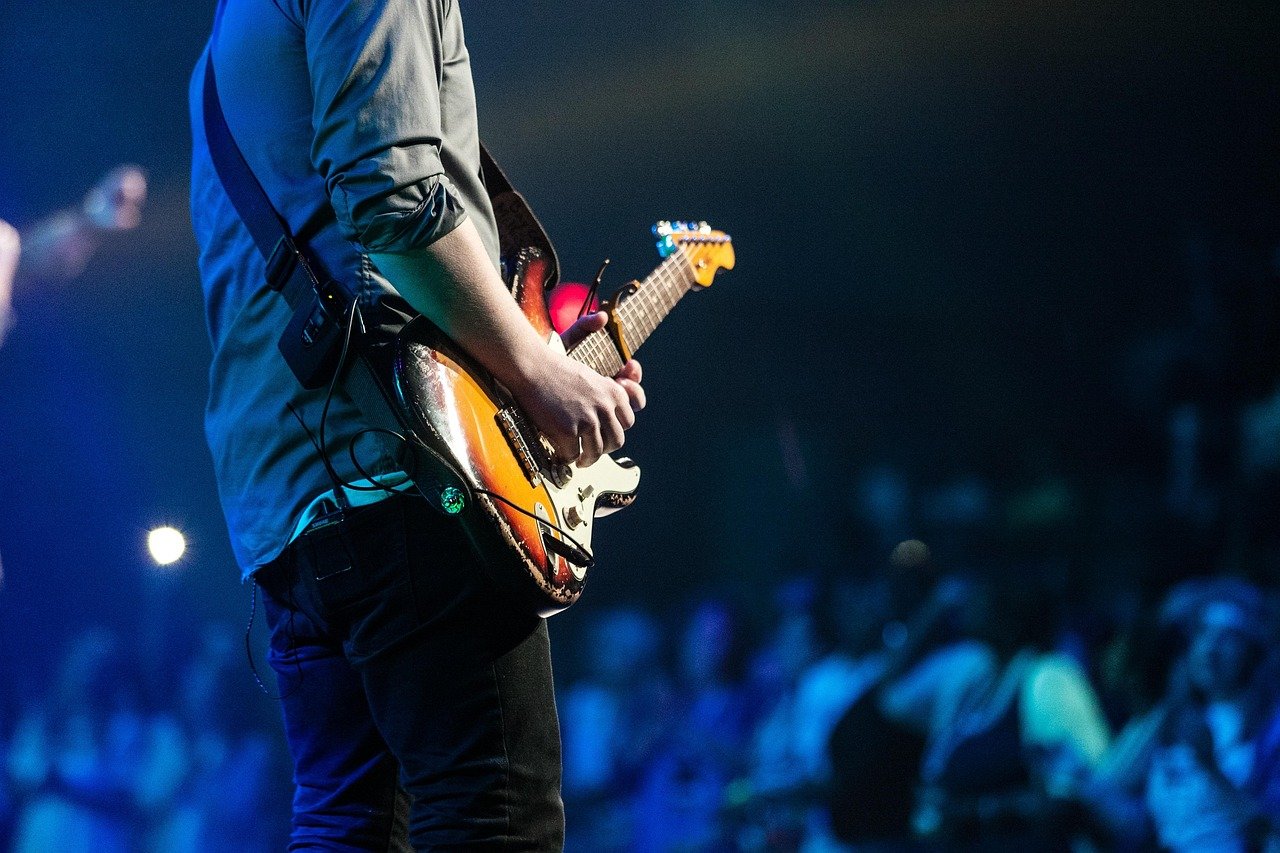
In a world saturated with digital content, the quality of sound has become more critical than ever. From the captivating soundtracks of blockbuster movies to the crisp, clear dialogue of your favorite podcast, the magic behind every sonic experience is audio production. It’s an intricate blend of art and science, transforming raw sounds into polished, professional audio that truly resonates with listeners. Whether you’re an aspiring musician, a budding podcaster, a filmmaker, or simply curious about the craft, understanding the principles of audio production is your key to unlocking a richer, more impactful auditory world.
The Foundation: Understanding Audio Production Basics
Audio production is the comprehensive process of creating, shaping, and refining sound for various media. It’s a journey that takes raw audio signals and transforms them into a cohesive, professional-sounding final product. This multifaceted discipline underpins virtually all modern media, from music and film to video games and advertising. Mastering its fundamentals is essential for anyone looking to create high-quality sonic content.
What is Audio Production?
- Definition: Audio production encompasses everything involved in recording, editing, mixing, and mastering audio. Its goal is to achieve clarity, balance, and impact, ensuring the sound meets professional standards and effectively conveys its intended message or emotion.
- Scope: This field is incredibly broad, impacting:
- Music Production: Recording bands, solo artists, electronic music creation.
- Podcasting and Broadcast: Ensuring clear speech, engaging sound design, and consistent levels.
- Film and Television: Dialogue recording, sound effects, Foley, and orchestral scoring.
- Video Games: Immersive soundscapes, character voices, and dynamic audio cues.
- Advertising and Marketing: Crafting memorable jingles and impactful voiceovers.
The Core Stages of Audio Production
The entire audio production workflow can be broken down into three primary, sequential stages, each crucial for the final outcome:
- Recording: This is the initial capture of sound. It involves selecting the right microphones, positioning them correctly, setting appropriate gain levels, and ensuring a clean signal in a suitable acoustic environment. A well-recorded source is the backbone of a great production.
- Mixing: In this stage, individual recorded tracks are balanced and blended together to create a cohesive stereo or surround sound field. This involves adjusting volume, panning, equalization (EQ), compression, and applying various effects like reverb and delay to sculpt the sound and create space.
- Mastering: The final polish. Mastering takes the stereo mix and optimizes it for distribution across various platforms (streaming, CD, vinyl). It involves subtle EQ adjustments, multi-band compression, limiting, and ensuring consistent loudness and dynamic range, making the track sound balanced and professional on any playback system.
Actionable Takeaway: Understand that while these stages are sequential, there’s often an iterative process. Decisions made in recording can impact mixing, and mixing choices directly influence mastering. A solid foundation in each stage is vital for a professional result.
Essential Gear for Your Audio Production Journey
Building a home studio doesn’t require breaking the bank, but investing in the right equipment is crucial for producing high-quality audio. Understanding what each piece of gear does and how to choose it will empower your production workflow.
The Heart of Your Studio: Digital Audio Workstations (DAWs)
A Digital Audio Workstation (DAW) is the central software application where you record, edit, mix, and master your audio. It’s your virtual studio console, multitrack recorder, and effects rack all in one.
- Key Functions:
- Multitrack Recording: Capturing multiple audio and MIDI tracks simultaneously.
- Audio Editing: Cutting, pasting, quantizing, time-stretching, and pitch correction.
- MIDI Sequencing: Programming virtual instruments and controlling hardware synthesizers.
- Mixing Console: Virtual faders, pan pots, effects inserts, and sends.
- Plugin Hosting: Supporting virtual instruments and effects (EQ, compressors, reverb, etc.).
- Popular DAWs:
- Professional Standards: Avid Pro Tools, Apple Logic Pro X (Mac only), Ableton Live, Steinberg Cubase, FL Studio, PreSonus Studio One.
- Beginner-Friendly/Free Options: GarageBand (Mac only), Audacity, Cakewalk by BandLab.
Actionable Takeaway: Choose a DAW that aligns with your budget, operating system, and the type of production you’ll be doing. Many offer free trials, allowing you to find one that feels intuitive to your workflow.
Capturing Sound: Microphones
Microphones are your ears in the recording process, converting acoustic energy into electrical signals. Selecting the right microphone for a specific source is paramount.
- Main Types:
- Condenser Microphones: Highly sensitive, wide frequency response, excellent for studio vocals, acoustic instruments, and detailed soundscapes. Require phantom power (+48V). (e.g., Rode NT1, Neumann TLM 103)
- Dynamic Microphones: Robust, durable, less sensitive, great for loud sources like drums, electric guitar amps, and live vocals. (e.g., Shure SM57, Shure SM58)
- Ribbon Microphones: Known for their warm, smooth, “vintage” sound, often used for vocals, guitar amps, and brass instruments. More fragile than dynamic mics.
- Polar Patterns: Describes how sensitive the microphone is to sounds coming from different directions.
- Cardioid: Heart-shaped pattern, picks up sound primarily from the front, rejecting sound from the rear. Ideal for isolating sources.
- Omnidirectional: Picks up sound equally from all directions. Great for capturing room ambience or multiple sources simultaneously.
- Figure-8 (Bidirectional): Picks up sound equally from the front and back, rejecting sound from the sides. Useful for duets or specific stereo miking techniques.
Practical Tip: A good large-diaphragm condenser mic for vocals and a versatile dynamic mic like an SM57 for instruments are excellent starting points for a home studio.
Connecting It All: Audio Interfaces
An audio interface is the bridge between your analog microphones/instruments and your digital DAW. It converts analog signals to digital (ADC) for your computer and digital signals back to analog (DAC) for your speakers or headphones.
- Key Features:
- High-Quality Preamplifiers: Boost the microphone signal to a usable level without adding noise.
- Phantom Power: Provides the necessary +48V for condenser microphones.
- Inputs/Outputs (I/O): Determines how many microphones or instruments you can record simultaneously and how many speakers/headphones you can connect.
- Low Latency: Crucial for monitoring yourself in real-time without distracting delays while recording.
- Examples: Focusrite Scarlett series, Universal Audio Apollo series, PreSonus AudioBox, Behringer U-Phoria.
Hearing the Truth: Studio Monitors and Headphones
Accurate monitoring is non-negotiable for making informed mixing and mastering decisions. Consumer speakers or headphones often have hyped frequencies, which can lead to mixes that don’t translate well elsewhere.
- Studio Monitors:
- Designed for a flat frequency response, meaning they reproduce sound as accurately as possible without coloration.
- Typically “near-field” monitors are used in home studios, placed close to the listener to minimize room acoustic interference.
- Examples: KRK Rokit, Yamaha HS series, JBL LSR series, Adam Audio T-series.
- Studio Headphones:
- Closed-back headphones: Excellent for recording, as they prevent sound from leaking out and being picked up by microphones. (e.g., Sony MDR-7506, Audio-Technica ATH-M50x)
- Open-back headphones: Often preferred for mixing due to their wider soundstage and more natural, less fatiguing sound, though they offer poor isolation. (e.g., Sennheiser HD 600, Beyerdynamic DT 990 Pro)
Actionable Takeaway: Invest in the best studio monitors and headphones you can afford. Accurate monitoring will significantly improve the quality and translation of your mixes across different playback systems.
The Art of Recording: Techniques for Pristine Audio
Recording is arguably the most crucial stage of audio production. A well-recorded source is half the battle won, as even the best mixing and mastering can’t fully fix a poorly recorded track. Focus on capturing the cleanest, highest-quality sound possible from the outset.
Optimizing Your Recording Environment
The room where you record plays a significant role in the quality of your audio. Uncontrolled reflections can lead to muddiness, phase issues, and an unprofessional sound.
- Acoustic Treatment:
- Absorption Panels: Reduce reverb and echo by soaking up sound waves. Place them at first reflection points (walls, ceiling where sound bounces directly from source to mic).
- Bass Traps: Crucial for home studios, as bass frequencies tend to build up in corners, leading to an inaccurate low-end perception.
- Diffusion Panels: Scatter sound waves, maintaining a lively room sound without harsh reflections.
- Room Dynamics: Aim for a balanced sound – not too dead, not too live. Hard, parallel surfaces are the enemy. Irregular shapes and soft furnishings help break up reflections.
Practical Tip: For budget-conscious home studios, strategically placed blankets, duvets, or even bookshelves filled with books can act as effective, albeit temporary, acoustic treatment. Record in the quietest room available and minimize external noise.
Microphone Placement and Technique
The “sound” of a microphone is heavily influenced by where it’s placed relative to the sound source and the room.
- Proximity Effect: Bass frequencies are exaggerated when a directional microphone is placed very close to the sound source. Use this creatively or manage it by adjusting distance.
- Off-Axis Rejection: Understanding a mic’s polar pattern helps you position it to reject unwanted sounds from specific directions.
- Vocal Techniques:
- Use a pop filter to eliminate plosives (harsh ‘p’ and ‘b’ sounds).
- Maintain a consistent distance from the microphone (6-12 inches is often a good starting point).
- Consider recording in a vocal booth or a treated corner to minimize room reflections.
- Instrument Miking:
- Guitar Amp: Experiment with placing a dynamic mic (e.g., SM57) near the cone for brightness, or further out for more body. Angling the mic off-axis can soften harshness.
- Acoustic Guitar: Try placing a condenser mic around the 12th fret for a balanced sound, or near the soundhole for more bass. A two-mic setup (one at 12th fret, one near the bridge) can capture more detail.
Actionable Takeaway: Don’t be afraid to experiment with microphone placement. A slight adjustment of an inch or an angle can make a profound difference in the captured sound, often more so than changing the microphone itself.
Mastering Gain Staging
Gain staging refers to setting the correct signal levels at each point in your audio chain. Proper gain staging is fundamental to achieving a clean, noise-free recording and mix.
- Objective: To maintain a healthy signal level without clipping (digital distortion) at any stage, while also avoiding signals that are too low and susceptible to noise.
- During Recording:
- Set your audio interface’s input gain so that the loudest peaks of your source signal hit around -10dBFS to -6dBFS (decibels full scale) in your DAW. This leaves ample headroom to prevent clipping.
- Avoid “recording hot”: Modern digital recording benefits from leaving headroom. Don’t aim for 0dBFS; there’s no “digital tape saturation” benefit, only distortion.
- Throughout the Mix: Keep individual track levels reasonable. Use faders to balance, not to make up for poor recording levels.
Practical Example: When recording a vocalist, have them sing their loudest passage. Adjust the gain knob on your audio interface until the input meter in your DAW consistently peaks in the green/yellow range, avoiding the red. This ensures you “record clean,” giving you more flexibility later.
Mixing Magic: Shaping Your Sound
Mixing is where individual tracks are transformed into a harmonious, balanced, and engaging listening experience. It’s the stage where you sculpt the sonic landscape, creating depth, width, and clarity through careful application of various processing tools.
Equalization (EQ): Taming Frequencies
Equalization (EQ) allows you to adjust the volume of specific frequencies within an audio signal. It’s used to balance the tonal characteristics of individual instruments and create space in the overall mix.
- Primary Uses:
- Cutting: Removing unwanted muddy, boomy, or harsh frequencies. Often, “subtractive EQ” (cutting) is more effective than “additive EQ” (boosting).
- Boosting: Enhancing desirable characteristics, adding clarity, warmth, or presence.
- Carving Space: Making room for different instruments in the same frequency range (e.g., cutting low-mids from a guitar to let the bass sit better).
- Types of EQ:
- Parametric EQ: Offers precise control over frequency, Q (bandwidth), and gain. Most common in DAWs.
- Graphic EQ: Fixed-frequency bands controlled by faders, often used for live sound or tone shaping.
- Shelving EQ: Boosts or cuts all frequencies above (high-shelf) or below (low-shelf) a specified point.
Practical Example: If your vocal track sounds muddy, try gently cutting around 200-400 Hz. If a cymbal track sounds dull, a subtle high-shelf boost above 8 kHz can add sparkle. Always listen critically and make small, informed adjustments.
Dynamics Processing: Compression and Gates
Dynamics processing tools control the volume fluctuations within an audio signal, making it more consistent and impactful.
- Compression: Reduces the dynamic range of a signal by lowering the volume of the loudest parts and, optionally, boosting the overall volume.
- Parameters: Threshold, Ratio, Attack, Release, Make-up Gain.
- Uses: Making vocals more consistent, adding punch to drums, gluing instruments together.
- Gates/Expanders:
- Gate: Mutes a signal when its volume falls below a set threshold, useful for removing unwanted noise between phrases (e.g., mic bleed on drums).
- Expander: Increases the dynamic range, making quiet parts quieter and loud parts louder (opposite of a compressor).
Actionable Takeaway: Use compression subtly. Over-compression can suck the life out of a performance. Aim for transparency unless a specific creative effect is desired. Start with a 2:1 or 3:1 ratio for vocals and adjust the threshold to only affect the loudest peaks.
Time-Based Effects: Reverb and Delay
These effects create a sense of space, depth, and ambience, adding dimension to your mix.
- Reverb: Simulates the natural reflections of sound in a physical space, making it sound like the audio is being played in a room, hall, or chamber.
- Types: Hall, Plate, Room, Spring, Gated.
- Uses: Adding realism, creating lush soundscapes, gluing disparate elements together.
- Delay: Creates echoes by repeating the original sound after a set period.
- Types: Slapback, Multi-tap, Ping-pong, Digital, Analog.
- Uses: Adding rhythmic interest, creating spaciousness, filling gaps in arrangements.
Practical Tip: Often, it’s best to use reverb and delay as “send” effects. This means you have one instance of the plugin on an auxiliary track and send varying amounts of each individual track’s signal to it. This saves CPU and helps create a more cohesive sense of space across the mix.
Stereo Imaging and Panning
Stereo imaging refers to how sounds are positioned within the left-to-right (width) and front-to-back (depth) sound field. Panning is the primary tool for positioning sounds horizontally.
- Panning:
- Move individual tracks left or right to create separation and a wider soundstage.
- Typical placements: Kick, snare, bass, and lead vocals often centered. Guitars, keyboards, backing vocals often panned left and right.
- Stereo Enhancers/Imagers: Plugins that can manipulate the perceived width of a stereo track, making it sound wider or narrower. Use sparingly to avoid phase issues.
Actionable Takeaway: Don’t just pan everything hard left or right. Create a balanced soundstage where each element has its own space. For example, a lead vocal and bass guitar are often centered for a strong foundation, while backing vocals might be spread out to create width.
The Final Polish: Mastering Your Audio
Mastering is the crucial final stage of audio production, the last stop before your music or audio content reaches its audience. It’s a highly specialized process designed to optimize your stereo mix for distribution, ensuring it sounds consistent and professional across all playback systems.
What is Mastering?
Mastering takes the stereo (or multi-channel) mix and applies a final layer of processing to achieve commercial readiness. It’s often referred to as the “final quality control” for audio.
- Primary Goals:
- Consistency: Ensuring all tracks on an album or podcast series have a cohesive sound, tonality, and loudness.
- Loudness Optimization: Making the audio competitively loud without sacrificing dynamic range or introducing distortion.
- Translability: Ensuring the audio sounds good on a wide variety of playback systems (car stereos, headphones, club sound systems, phone speakers).
- Metadata Encoding: Adding track information, ISRC codes, and other necessary data for distribution.
- Difference from Mixing: While mixing focuses on balancing individual elements within a song, mastering focuses on the overall sonic impression of the complete mix, and its context within an entire project.
Essential Mastering Tools
Mastering engineers use a suite of high-quality tools, often hardware and software, to achieve their goals. The key is subtle, precise application.
- EQ (Equalization): Applied globally to make very subtle tonal adjustments to the entire mix. For instance, a very slight high-end boost might add “air,” or a low-mid cut might reduce overall muddiness.
- Multi-band Compression: Unlike standard compression, multi-band compression allows different frequency ranges to be compressed independently. This is powerful for taming resonant frequencies or enhancing specific bands without affecting the entire spectrum.
- Limiter: The most crucial tool for loudness. A limiter prevents the audio signal from exceeding 0dBFS, essentially acting as an aggressive brick-wall compressor. It allows the overall level to be raised without clipping, thus achieving competitive loudness.
- Stereo Imager: Used sparingly to make subtle adjustments to the width and depth of the stereo field, enhancing perceived spaciousness if needed.
- Dither: Applied when reducing the bit depth (e.g., from 24-bit mix to 16-bit master for CD) to minimize quantization noise.
The Loudness War and Dynamic Range
For years, there was an industry trend to make music as loud as possible (“the Loudness War”), often at the expense of dynamic range (the difference between the loudest and quietest parts). However, streaming platforms have introduced new standards.
- LUFS (Loudness Units Full Scale): Streaming services like Spotify, Apple Music, and YouTube use LUFS to measure and normalize audio loudness. They will turn down tracks that are too loud to their target LUFS (e.g., -14 LUFS integrated).
- Importance of Dynamic Range: While loudness is important, preserving dynamic range allows the music to breathe and have more impact. A track with good dynamics often sounds more engaging and less fatiguing to the listener.
Practical Tip: Instead of aiming for maximum loudness (0dBFS peaks with heavy limiting), focus on achieving a great-sounding, dynamic master that meets the integrated LUFS targets of major streaming platforms. This ensures your music will sound consistent and avoid being turned down by the platform’s algorithms.
Actionable Takeaway: Mastering requires a highly trained ear and specialized acoustic environment. While basic limiting can be done at home, for critical projects, consider hiring a professional mastering engineer. Their expertise and unbiased perspective can elevate your audio significantly.
Conclusion
Audio production is a fascinating and rewarding journey that blends technical prowess with creative expression. From carefully selecting your gear and meticulously recording your sources, to artfully mixing and precisely mastering your tracks, each stage plays a vital role in crafting a professional and impactful sound. It’s a craft that demands patience, a keen ear, and continuous learning.
Embrace the process, experiment with different techniques, and remember that the goal is always to serve the song or story. Whether you’re producing music, podcasts, or sound for film, a deep understanding of audio production principles will empower you to bring your sonic visions to life. So, plug in, turn up, and embark on your own audio adventure – the world is waiting to hear what you create.